AutoCAD Sheet set manager is palette in AutoCAD which has very best features that can be used to manage our drawings. Sheet set manager can be used to organize model views, layouts, and project information into categories called subsets. We can create different subsets for each discipline of the project.
Sheet Set manager reduces the usage of windows explorer or other third party software for file management. It can be used even when you have more number of drawings in a project to manage.
Creating sheet set from scratch
We have to prepare layouts for the drawings that we plan to use in the sheet set. We have to create title block with required fields and attributes before creating the layout view.
For now, let’s consider that you have prepared the layouts with required views and details. Create a new folder and name it as “Sheet Set”. Copy all the drawings that contain the layout views to be used in Sheet set. This folder can be placed in your local drive or over a network. For this exercise, I’m creating the folder in the desktop.
Launch AutoCAD and open a new file. In the new file type the command SSM on the command line and press enter. This launches the Sheet Set Manager palette.
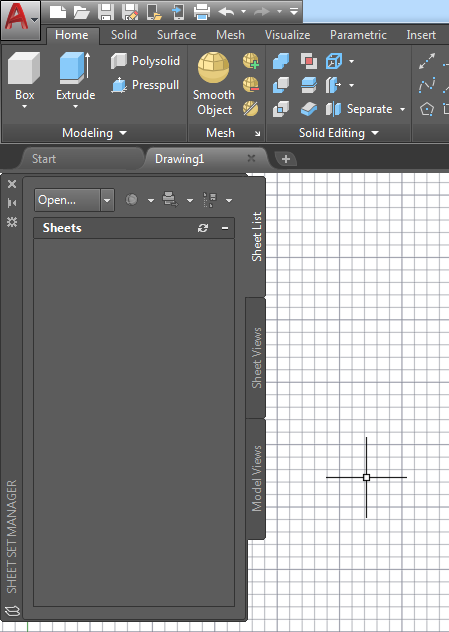
In the palette click on the drop-down menu next to “Open” at the top and select “New Sheet Set” from the list. Then select the “Existing Drawings” button from Create Sheet set wizard and click next.
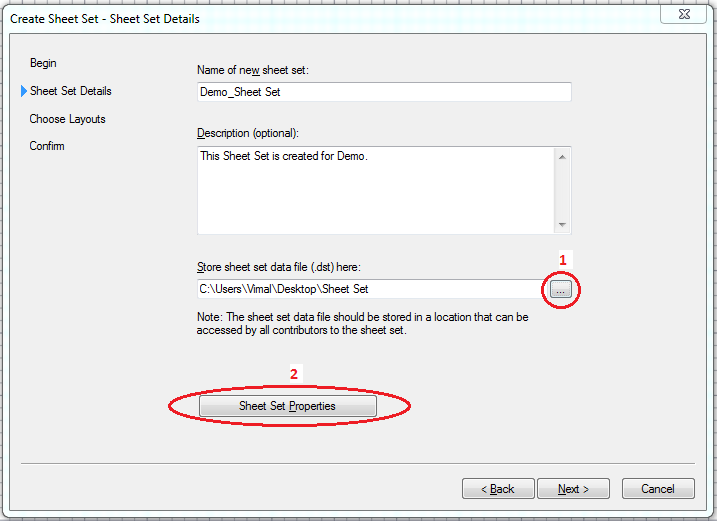
Specify desired name for your sheet set in the Name field and enter a description. In my tutorial I’m giving the name as “Demo-Sheet Set”.
Click the box next to the “Store Sheet Set” and select the folder from desktop. This saves the Sheet set file in the same folder on the desktop.
The extension for Sheet Set file is “name.dst”.
To update the Project properties click on Sheet Set Properties button as shown in the image above.
In the Properties dialog box specify Project number and Project name under the heading “Project Control” and click OK then click Next.
In the “Choose Layouts” page click on “Browse” button and add the Sheet Set folder from the desktop. The drawings and layouts are listed in a hierarchical order.
We can remove the drawings and layouts which you don’t want to include in the sheet set and click Next, then click Finish. The created Sheet Set will be updated in the Sheet Set Manager palette, with all the selected layouts.
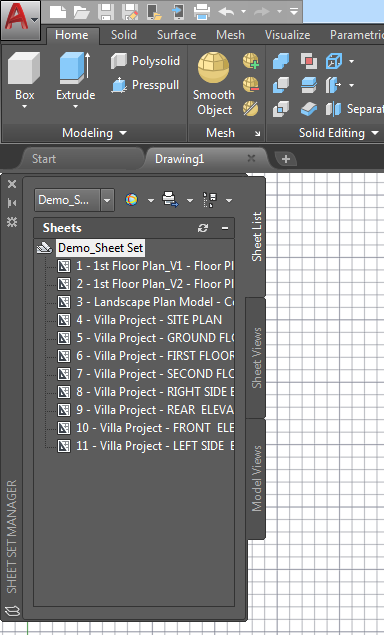
Creating Subsets
From the existing Sheet Set we can create subsets. To create a subset right click on the name “Demo_Sheet Set” and select New Subset from the menu. Specify the name for the new subset as “Architectural” and click OK.
You can drag and drop desired layouts under the new subset. Multiple layouts can be moved by pressing CTRL key as well.
Adding Templates for Sheet Set
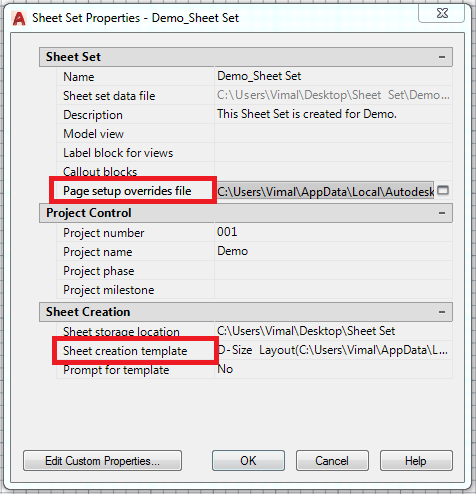
We can assign default templates for a new sheet created in the Sheet Set Manager. To set the default template select the sheet set then right click and select properties from the menu. Specify the template location for the properties as shown in the image below.
Print / Publish the Sheet Set
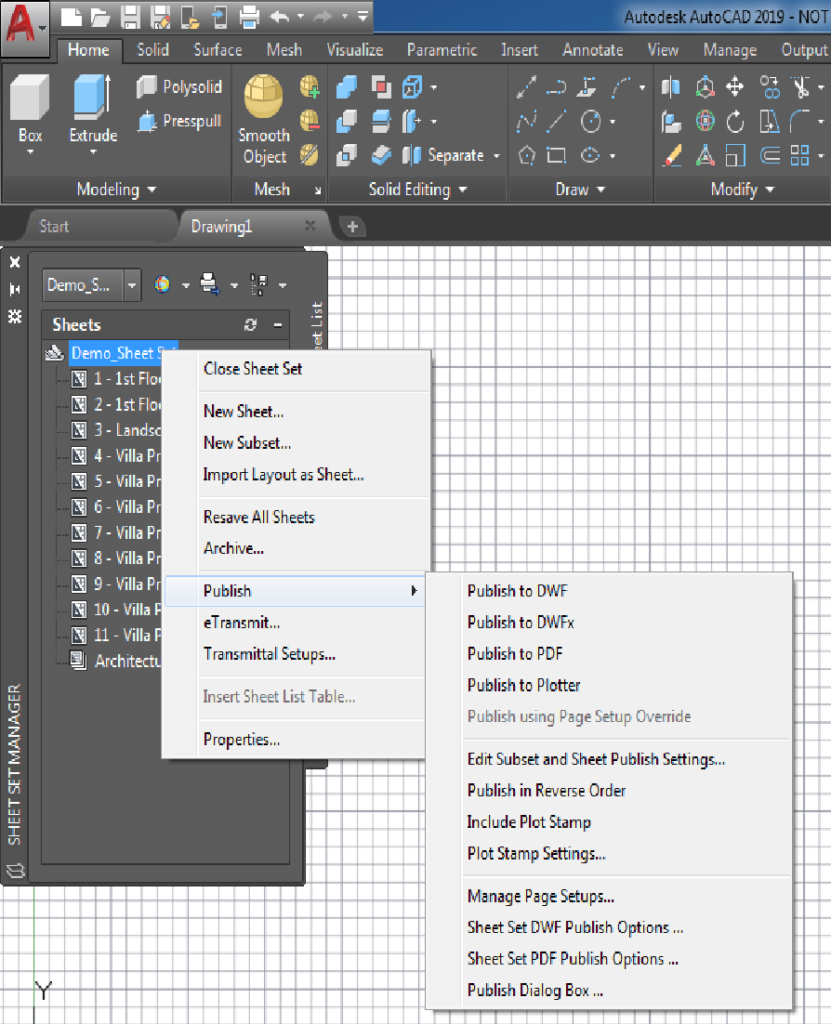
To Print / Publish all the layouts in the Sheet Set, right click on the name and hover over the Publish from the menu. From the sub menu you can choose to publish to DWF, DWFx, PDF and Plotters. You can also Print / Publish required layouts by using CTRL key, then right click and choose Publish option.
Know more
If you are interested in learning more about AutoCAD Sheet Set then you can enroll in AutoCAD Course.

