
A schedule is a tabular display of information, extracted from the properties of the elements in a project. Schedules are “Spreadsheets”that are connected to your model. If you modify an element in the model, it will be updated in the schedule and vice-versa so there is always link between the model and schedule table.
Launch Revit and open your project.
Creating a new Schedule
View Tab -> Create Panel -> Schedules drop-down -> Schedules/Quantities.
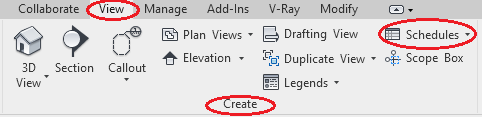
Note: Right click on the schedules in project browser and click New Schedules/Quantities option to create schedules
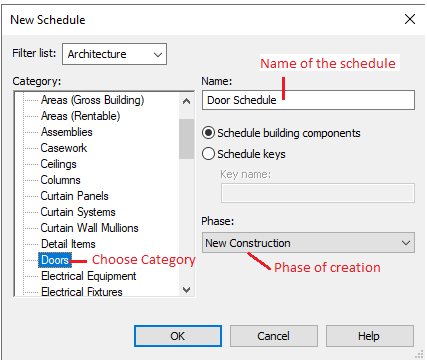
In the “New Schedule” dialogue box Select Doors from the Category list. (You can select any category for which you want to create Schedules. Here I am going to create Schedules for the door in my project).
Specify the name as “Door Schedule” and select “Schedule building Components” and define the phase at which the doors are created
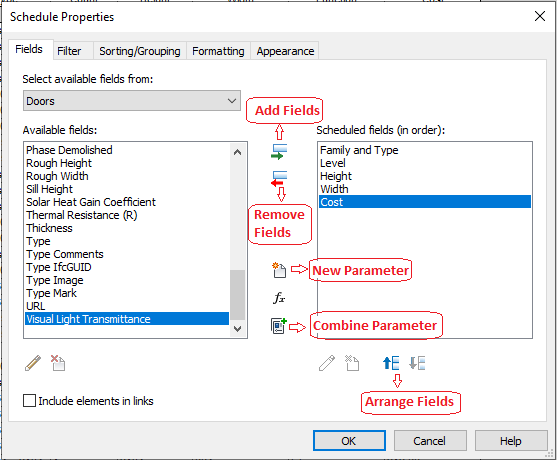
Adding fields to Schedule
- To add the Fields in our Schedule select the desired fields below the available fields and click the add button. I’m adding the following fields to my Schedule table.
- Family and Type
- Level
- Height
- Width
- Cost
- We can rearrange the fields by any order that we want it to be displayed.
- We can add “New Parameter” to the category and also we can “Combine Parameters”.
- In addition we can also create “Custom Formulas” to create new field and display that in our schedule.
- Click “OK” to create Schedules.
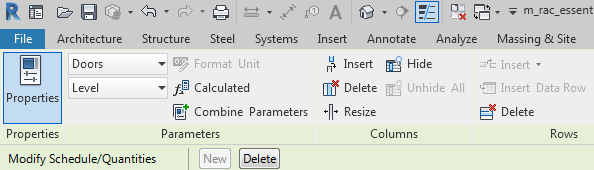
Modify Schedule
A new spreadsheet will be created in the name of “Door Schedule” which we specified earlier. As the Schedule is in the form of Spreadsheet. We can
- Edit the row height and column width.
- Rename the Headings.
- We can change the Units of the fields.
- We can change the Alignment and Borders.
Sorting and Grouping the Schedule
We can organize the Schedule table by Sorting as per our requirement.
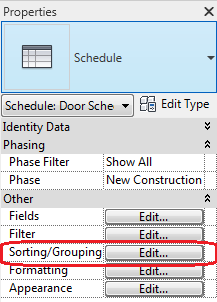
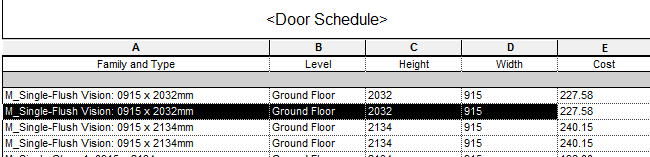
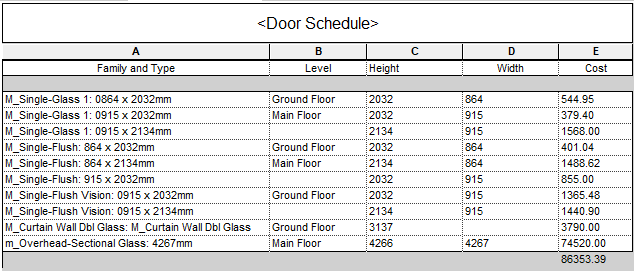
The organized Schedule table will be displayed as below
Grouping the elements
In this Schedule every instance of door is listed. Most of the times we prefer grouping the elements of same type. For this we use “Sorting and Grouping” we can do this before and after the creation of schedules. In the “Schedule Properties” dialog box uncheck the “Itemize every instance” option. As well as we can sort by specific fields that we choose.
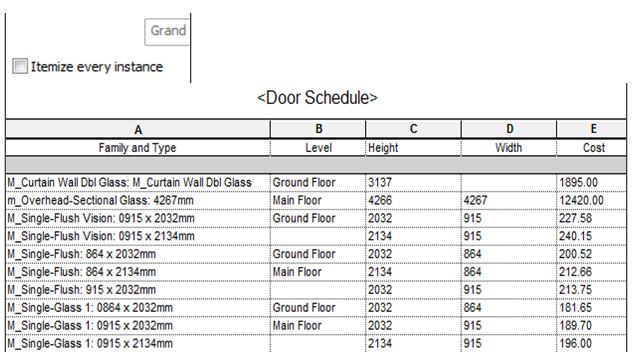
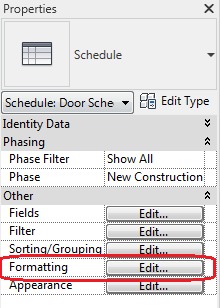
Calculating totals
To calculate the totals for a field, make sure that “Calculate total” is activated in the “Formatting tab” of the Schedule Properties.
- Select the field for which you want to specify totals.
- Choose Calculate totals in Field formatting option.
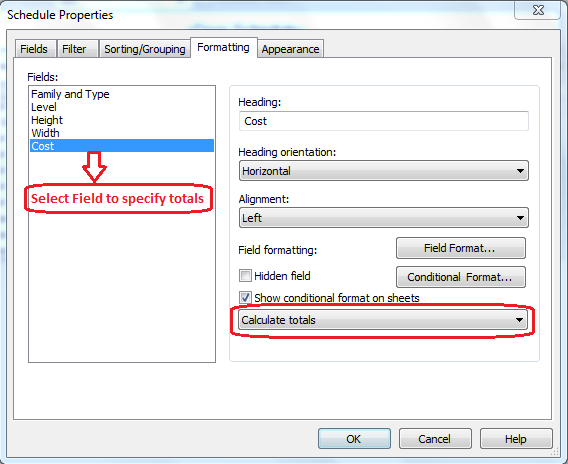

- Again go to “Sorting and Grouping” properties.
- Below the “Sort by Field” select the “Footer” check box and choose “Totals only” to get the totals of each families.
- And select the “Grand total” option to get the grand totals.
In addition to this we can create other Schedules like Graphical Column Schedule, Material Take off, View List and Sheet list in the similar way.
If you are interested in learning in detail about Schedules and Schedule keys then you can enroll in Revit Course.